In the previous article, we explained what is AngularJS. What is it used for? Now you might be thinking about how to write a simple application using the AngularJS platform, what are the coding techniques (syntax) used for designing the page, and all that.
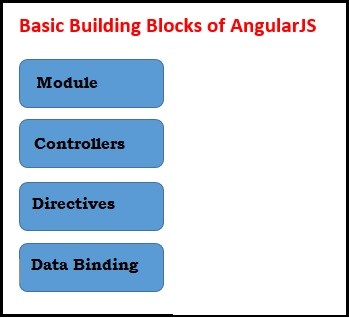
In this article, we will learn about the basic building blocks of AngularJS which are essential to design an AngularJS page/application and they are:
- Module
- Controllers
- Directives
- Data Binding
Module:
An Angular module is a base element for an application. It is a container for a group of related components such as controllers, services, filters, directives etc. You can think of a module as a library of components and services that provides certain functionality from the business domain of your application.
In AngularJS, a module is required to bootstrap the application. It behaves like the main entry for an app when launched. All elements of a small application can be located in one module I.e root module whereas larger apps can have more than one module, but all apps must have at least a root module.
A module is created by using the AngularJS function angular.module
<div ng-app="myApp" ng-controller="myCtrl">
</div>

<script>
var app = angular.module("myApp", []);
</script>
Here “myApp” is an HTML element where the application will run and is attached in view.
Controllers:
An AngularJS Controller acts as a mediator between the view and module. It controls the data in the angular application. It holds both data and business logic.
In AngularJS, Controllers are normal javascript objects, defined by the Javascript object constructor function. Controllers are used to setting up the initial state for the $scope object and to add the behaviors to it. As the name suggests an Angular $scope is an object which holds the scope of an entire model i.e here a controller.
In Angular, Controller can be attached to the DOM in two ways, using ‘ng-controller’ where a new controller object is created and a new child scope ‘$scope’ is created. This child scope is passed as a parameter to the constructor function. Another way is using ‘controller as’ where the controller instance is assigned to the new scope.
An example of how to define a controller and refer in UI is shown below.
myController.js page:
var app = angular.module('myApp', []);
app.controller('myCtrl',['$scope', function($scope){
 $scope.firstname = "John";
 $scope.lastname = "Doe";
}]);
Here we can see that a new controller called ‘myCtrl’ is created within ‘myApp’ module. The child scope object ‘$scope’ is passed as the parameter to the controller. There are two properties created in the $scope, ‘firstName’ and ‘lastName’ whose values will be then be used to display in UI.
Index.html page:
<div ng-app="myApp" ng-controller="myCtrl">
Hello <strong>{{firstName + " " + lastName}} </strong>!
</div>
In the above example, you can see that the controller is attached to the DOM using an ng-controller attribute.
Directives:
In Angular, we use some new syntax/tags/attributes which does not come with basic HTML. These are called Directives. Directives can be an attribute, an element name, a comment or a CSS class. They just extend the basic HTML.
In Angular, we have a set of built-in directives with ng-prefix which provides predefined functionality to our application. AngularJS also provides the capability to write your own directives as well.
Some of the built-in directives are:
- ng-app: This ng-app directive is the root element of an AngularJS application. This directive initializes an AngularJS application when launched.
- ng-controller: The ng-controller directive defines the controller object for an application. This provides an instance of a controller through which the data can be used in the view.
- ng-model: The ng-model directive binds the value of HTML controls (such as input, textarea, select, and checkbox) to application data. It is also used for the type validation for application data, and provides status for the app data.
- ng-init: The ng-init directive defines initial values for an application. For instance, if you want to set any default value in your application, in such case this directive is useful.
You can define your own custom directive as follows.
var app = angular.module("myApp", []);
app.directive("testDirective", function() {
 return {
   template : "This is custom directive"
  };
});
You can invoke this directive by using:
- Element Name
- Attribute
- Class
- Comment
Below examples show how the above directive is invoked.
As Element Name:
<test-directive></test-directive>
As Attribute:
<div test-directive></div>
As Class:
<div class="test-directive"></div>
As Comment:
<!--directive: test-directive -->
You can restrict the directive by adding ‘restrict’ property in the directive definition (as a template).
The restrict values are :
- E for Element name
- A for Attribute
- C for Class
- M for Comment
By default this property value is EA.
For Comment, in order to display the content of a directive, replace property needs to be added in the directive definition with value as true.
Data Binding:
In AngularJS, Data Binding is the technique of automatic data synchronization between the model and the view. When the data in the model changes, it immediately reflects in the view and also when the data in the view changes, it is immediately updated in the model. Here, the model is the only source of truth for data changes in the application. The view is just the presentation of model data.
We have two types of data binding
- One-Way Data Binding
- Two-Way Data Binding
One-Way Data Binding:
This type of data binding is usually seen in classical systems. Most of the application use classical HTML templating system where data binding occurs in one direction. They compile both HTML template and its related code at once and produce the view. You can see the below figure.

Hence if there is any change in model is not reflected again in the view nor view changes are reflected in the model. So separate code has to be written to handle this situation.
Two-Way Data Binding (AngularJS Data Binding):
AngularJS has made developers life easy and as well provides high performance and resolutions.
As you can see in below figure, angularJS template is compiled first on the browser and produces the view. After compilation, if there are any changes in the view, it is updated in the model too. In the same way, if there are any changes in the model, the same is reflected immediately in the view too. This process occurs continuously when any change occurs in either of the two, without any compilation further. This greatly simplifies the programming model for the developer.
Here, only the model is aware of the view, the controller is completely separated from the view. This makes testing very easy for the developer without any dependency on view/browser.
I hope this article helped you to understand the basic components of AngularJS. Let me know if you have any queries.
– Contributed by Preeti Dhavali.