You may have come across a list of categories on each website or application, it is called Menu, which is a broader picture of information that an application would have i.e. any project whose requirements are divided into a number of tasks will be combined under one tree called MENU. The best example we can say as, any shopping site will have a submenu called Electronics, Clothing, Home appliances etc under “Department”. Click on the link to learn login functionality in AngularJS. If you are looking for a combined login and registration application, click on the link.
In this article, we will see how can we navigate from one submenu to other using AngularJS.
We will build a simple shopping site application with below menu titles. On clicking on any menu item it displays which menu item is chosen.
- Home
- Electronics
- Appliances
- Clothing
We will have application folder structure with 3 files: index.html, app.js and style page style.css
The below code explains index.html.
<!DOCTYPE html>
<html>
  <head>
    <link rel="stylesheet" href="style.css">
    <script src="https://code.angularjs.org/1.2.13/angular.js"></script>
    <script src="//cdnjs.cloudflare.com/ajax/libs/angular-material-icons/0.7.1/
                  angular-material-icons.min.js"></script>
    <script src="app.js"></script>
  </head>
  <body>
   <!-- Adding the ng-app declaration to initialize AngularJS -->
    <div id="main" ng-app="navApp">
        <!-- The navigation menu will get the value of the "active" variable
             as a class.
             The $event.preventDefault() stops the page from jumping when a
             link is clicked. -->
        <nav class="{{active}}" ng-click="$event.preventDefault()">
            <!-- When a link in the menu is clicked, we set the active variable -->
            <h2>Shopping Site</h2>
            <a href="#" class="home" ng-click="active='home'">
             <ng-md-icon icon="home" style="fill:white"></ng-md-icon>
            </a>
            <a href="#" class="electronics" ng-click="active='electronics'">
              Electronics</a>
            <a href="#" class="appliances" ng-click="active='appliances'">
              Appliances</a>
            <a href="#" class="clothing" ng-click="active='clothing'">
              Clothing</a>
        </nav>
        <!-- ng-show will show an element if the value in the quotes is truthful,
        while ng-hide does the opposite. Because the active variable is not set
             initially, this will cause the first paragraph to be visible. -->
        <p ng-hide="active">Please click a menu item</p>
        <p ng-show="active">You chose <b>{{active}}</b></p>
    </div>
  </body>
</html>
As you can see above, we have used nav directive for navigation menu and 4 hyperlinks called Home, Electronics, Appliances and Clothing and 2 paragraphs for showing which menu is chosen.
The below code shows a javascript file app.js. This file is used as a controller for application module creation and having other logics if required.
var navApp = angular.module('navApp',['ngMdIcons']);
Since we do not have any logic to be included in this app, we have just created an app module to include ngMdIcons.
We have stylesheet file for styling this application. Please take a look at it below.
/* Styles go here */
*{
    margin:0;
    padding:0;
}

body{
    font:15px/1.3 'Open Sans', sans-serif;
    color: #5e5b64;
    text-align:center;
}

a, a:visited {
    outline:none;
    color:#389dc1;
}

a:hover{
    text-decoration:none;
}

a img{
  display:inline-block;
}

section, footer, header, aside, nav{
    display: block;
}

/*-------------------------
    The menu
--------------------------*/

nav{
    display:inline-block;
    margin:60px auto 45px;
    background-color:#5597b4;
    box-shadow:0 1px 1px #ccc;
    border-radius:2px;
}

nav h2{
  color:#fff !important;
}

nav a{
    display:inline-block;
    padding: 18px 30px;
    color:#fff !important;
    font-weight:bold;
    font-size:16px;
    text-decoration:none !important;
    line-height:1;
    text-transform: uppercase;
    background-color:transparent;


    -webkit-transition:background-color 0.25s;
    -moz-transition:background-color 0.25s;
    transition:background-color 0.25s;
}

nav a:first-child{
    border-radius:2px 0 0 2px;
}

nav a:last-child{
    border-radius:0 2px 2px 0;
}

nav.home .home,
nav.electronics .electronics,
nav.appliances .appliances,
nav.clothing .clothing{
    color:yellow !important;
}

p{
    font-size:22px;
    font-weight:bold;
    color:#7d9098;
}

p b{
    color:#ffffff;
    display:inline-block;
    padding:5px 10px;
    background-color:#c4d7e0;
    border-radius:2px;
    text-transform:uppercase;
    font-size:18px;
}
Let us run this application and look at the result. The below image gives a picture of initial phase when you run your application, it looks like below.
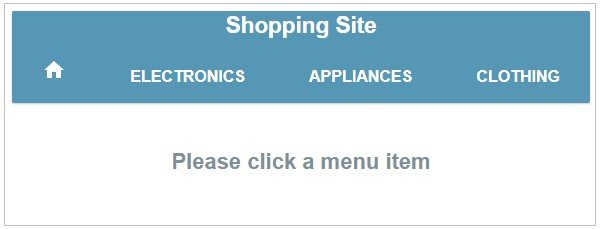
Since the user has not clicked on any menu item, the description shows to select something.
When the user selects/clicks a menu, the description will be changed to “you chose ….”. Also, observe the change in menu text color.

Conclusion:
Navigation creation in AngularJS is very easy and anyone can create it within less time. You can also try using a fancy stylesheet to increase the look and feel.